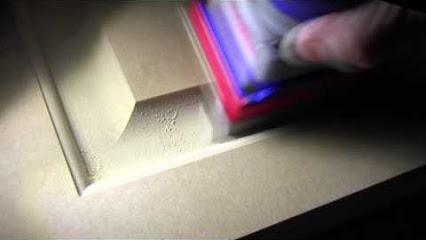
Editor's note: Adam West will be a featured presenter at Wood Pro Expo Charlotte March 6-8.
CHARLOTTE -- If I had a dime for every time I’ve heard these statements I'd be a wealthy man: “My hand sanding personnel sand way too much!” “They take way too long!”
It's important to know the consequences of over sanding.
1. Excess labor costs. Every minute wasted costs money.
2. Reduced productivity/through-put. If the operator doesn’t know when they are finished sanding they resort to muscle memory and estimation to decide how much to sand. More is always better, right?
3. Decreased color consistency/variations in polish/splotchiness. Inability to see the surface properly often leads to sanding so much that the surface is polished causing splotchiness and poor stain penetration. If they sand a really long time then they are sure not to get yelled at for missing something, right?
4. Increased defects/rounding/pillowing. People are people. A bit too much pressure in the wrong spot and you have a rounded corner or surface. The more you sand the worse it gets.
5. Increased swirls. This is a tricky one. I was doing an orbital sander demo for a company here in Ohio. The operator used our 3/16” orbital and gold sandpaper to sand a maple table top and he did a wonderful job. We had laid our light on the table so he could see when he was done sanding out the widebelt scratch from their panel supplier. He sanded with light pressure just until the scratches were gone and there were very little light orbital scratches. Another operator came over to try the same exact orbital sander with the same sandpaper and the same piece of maple, only he was sanding the already sanded area of the board. I’m really glad he did. He created swirl marks plain as day. Not because he was sanding too hard or had a bad sander or bad sandpaper, but because he over sanded the surface until it started to feel like glass.
 Adam West will be a featured presenter at Wood Pro Expo Charlotte. He is an abrasives specialist for SurfPrep. He has been in the woodworking industry since1995.
I handed him my safety glasses and asked him to sand the lense with the sander but not to leave any scratches. He laughed at the suggestion but he had a hard time understanding how that applied to the wood. The wood was polished to the point of being shiny. Once the surface is shiny and hard it is impossible to sand without creating swirls. Stopping at the base of the wide belt scratch left very little orbital scratch. Once you hit a flat plane you must stop sanding. Definitely do not push hard or you will drive the grains into the flat surface, carving out the unwanted swirls.
How do we avoid over-sanding?
First, the person on the hand sanding table must know what they are trying to accomplish.The key to this is the ability to show the person sanding what they are trying to remove. This is best accomplished with proper lighting, however, proper lighting can be a topic of huge debate.
Do this experiment to help you understand proper lighting: grab a flashlight and a piece of widebelt sanded wood or veneer panel. Shine the flashlight directly at the surface (90 degrees) and look at it. Then lay the flashlight down on the surface shining across the direction of the sanding scratches. The light from above will fill in the scratches and make them almost impossible to see. The raking, low angle light will silhouette the scratches and make it extremely easy to pick up the defects that need sanded out. This low angle light will allow the hand sander to see when the defects are gone in real time so they can stop sanding when the product is finished. They can stop when they get to a flat surface and stop creating swirls.
Proper sanding table lighting is absolutely the single most important tool for avoiding oversanding, increased productivity, and defect reduction. The light must be perfectly even, showing no inclusions (gaps or shadows in the light), covering the entire workspace with even light. The lights above the table should not be too bright or they will continue to mask the defects from the operator. I can make wonderful sanding scratches with the wide belt sander that will melt away like warm butter, but if the operator cannot see when they are gone they will resort to their old ways.
Adam West is an Abrasives Specialist for SurfPrep. He has been in the woodworking industry since1995, and has worked his way up from sanding on a production line to being known as the best technical abrasive specialist in the industry.


Have something to say? Share your thoughts with us in the comments below.