
Jobsite finishing projects have always been problematic. It’s so much easier to get good results in your shop-based spray booth. Don’t you wish you could take the spray booth to the job site? With a new product from The PaintLine, you can.
The PaintLine’s Portable Jobsite Spray Booth (PJSB) is designed to be a reusable, easily transportable finishing alternative to a conventional spray booth, complete with filtered air evacuation. It features an easy-to-assemble frame, disposable plastic liners, and canvas carry bags to transport the system.

The base of the booth is made up of four aluminum extrusions that connect with welded steel corners. There are provisions for six vertical posts, which assemble like tent poles with internal shock cords.
Setting it up
Assembling the PJSB for the first time is a little like setting up a camping tent for the first time.
Carefully following the instructions and taking my time, it took about 45 minutes the first time to assemble the booth itself and another 15 minutes to attach the blower.
I suspect that after I’ve done it a few times, I’d probably cut those times in half.
The base of the booth is made up of four aluminum extrusions that connect with welded steel corners. There are provisions for six vertical posts, which assemble like tent poles with internal shock cords.
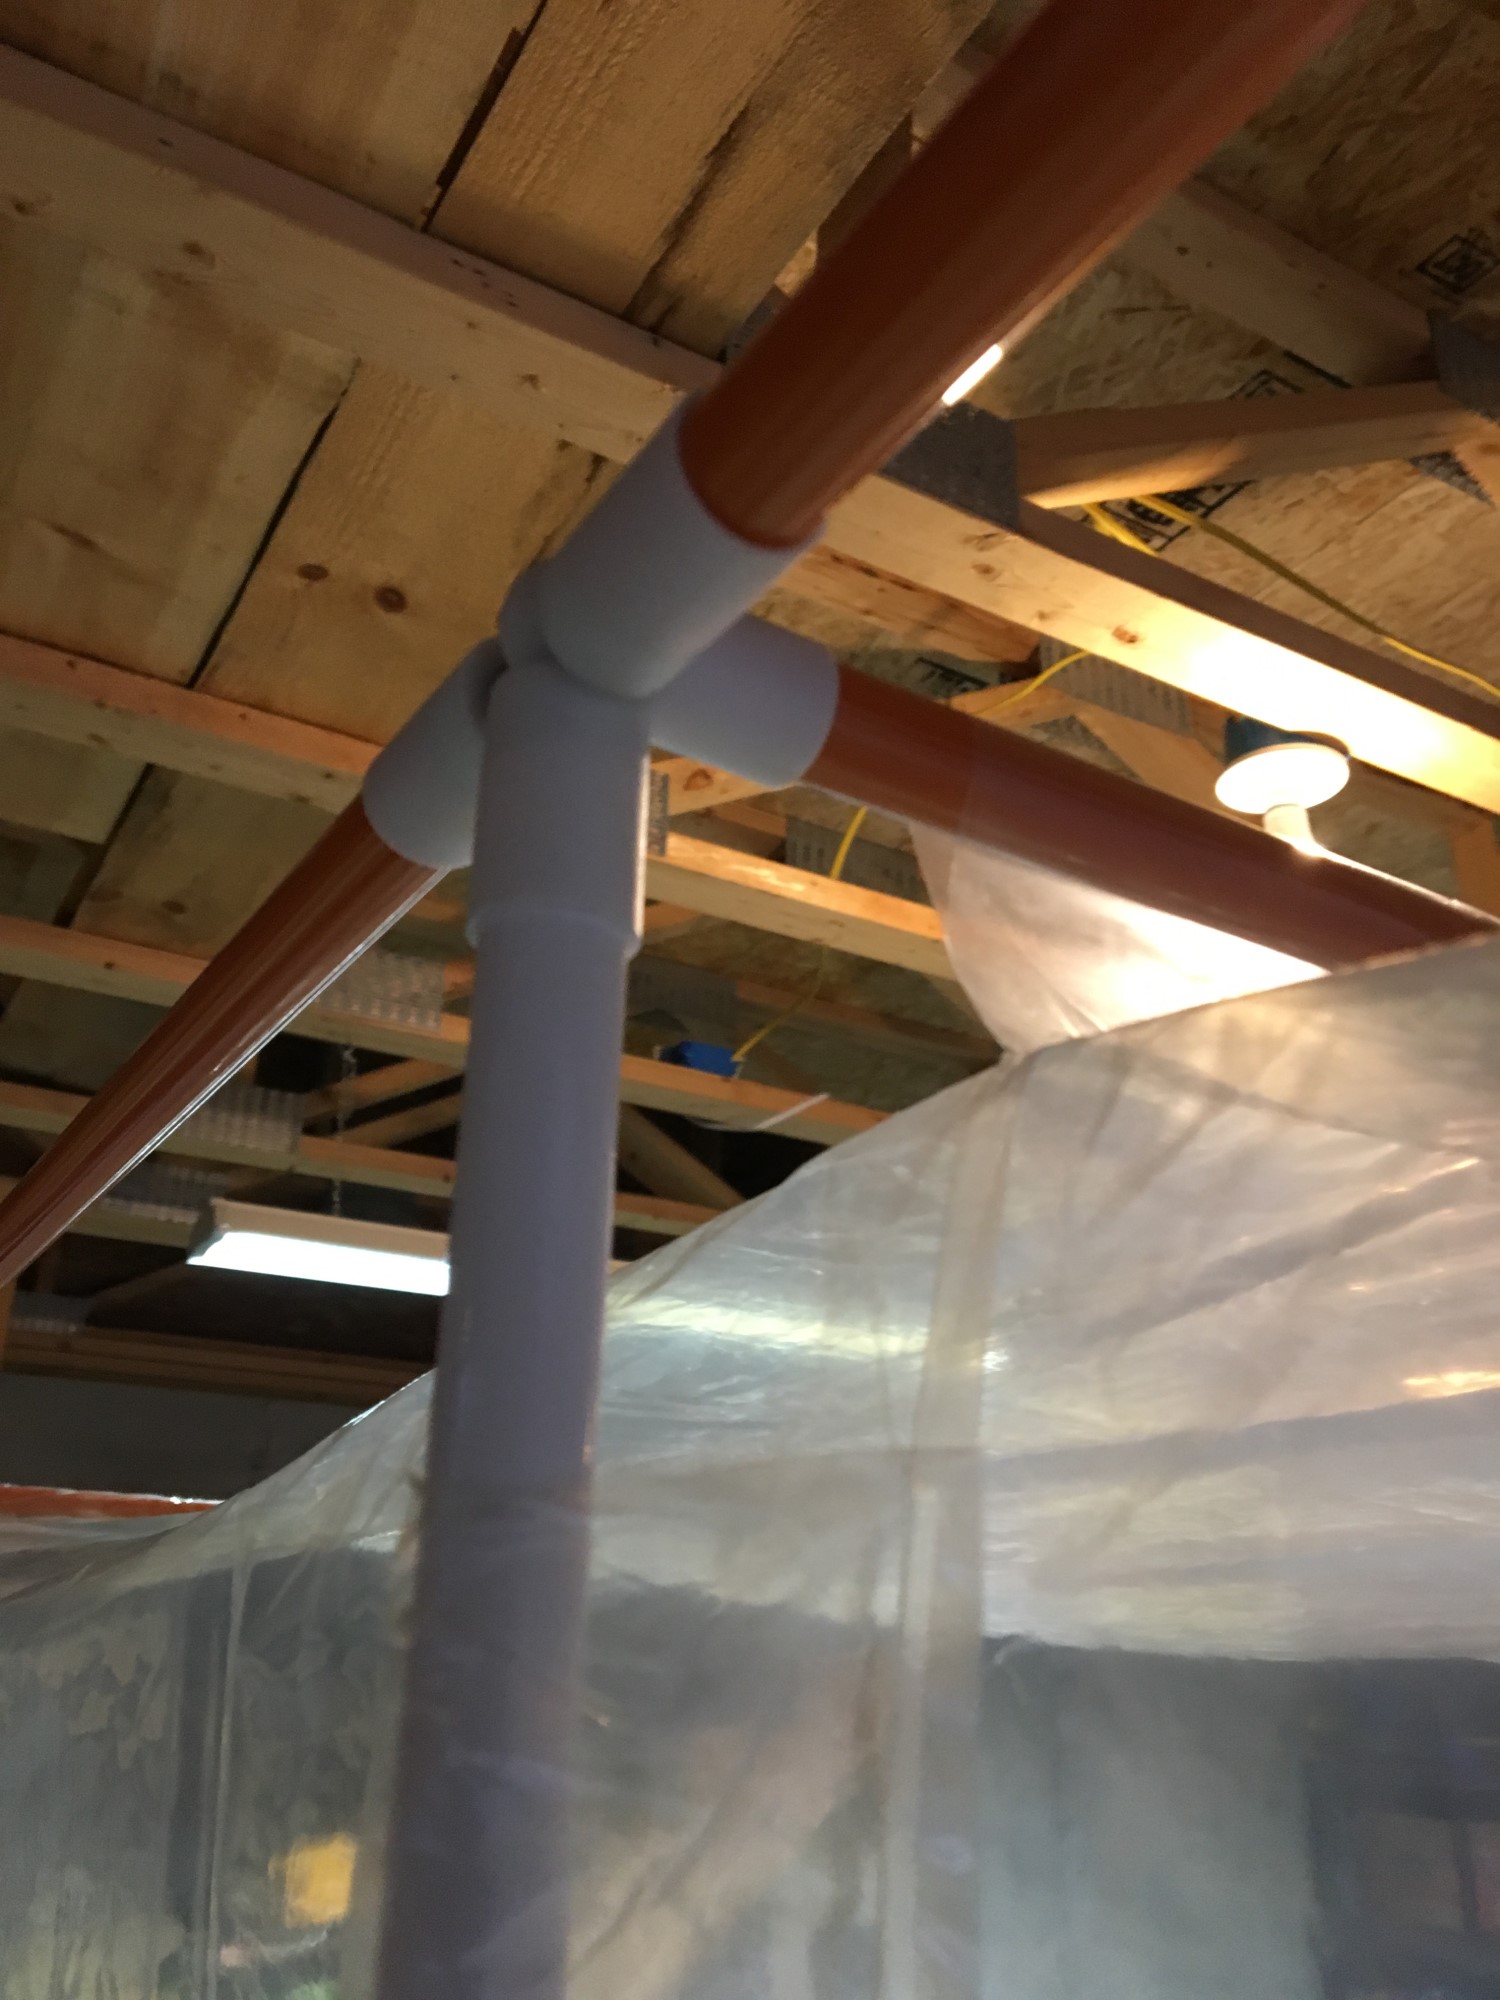
The top and cross poles, which join to the vertical poles with a clever system of powerful magnetic connections.
Once you have the base and poles set up, you unfold the plastic liner and slide it over the poles one at a time, following locator labels on the liner. The liner is a big five-sided box with tubes built into it to take the poles and posts.
After the liner comes the top and cross poles, which join to the vertical poles with a clever system of powerful magnetic connections. It’s surprisingly sturdy even though there is no mechanical connection.
 The filtered vent and blower attach easily to the plastic liner to provide full ventilation.
Adding the blower
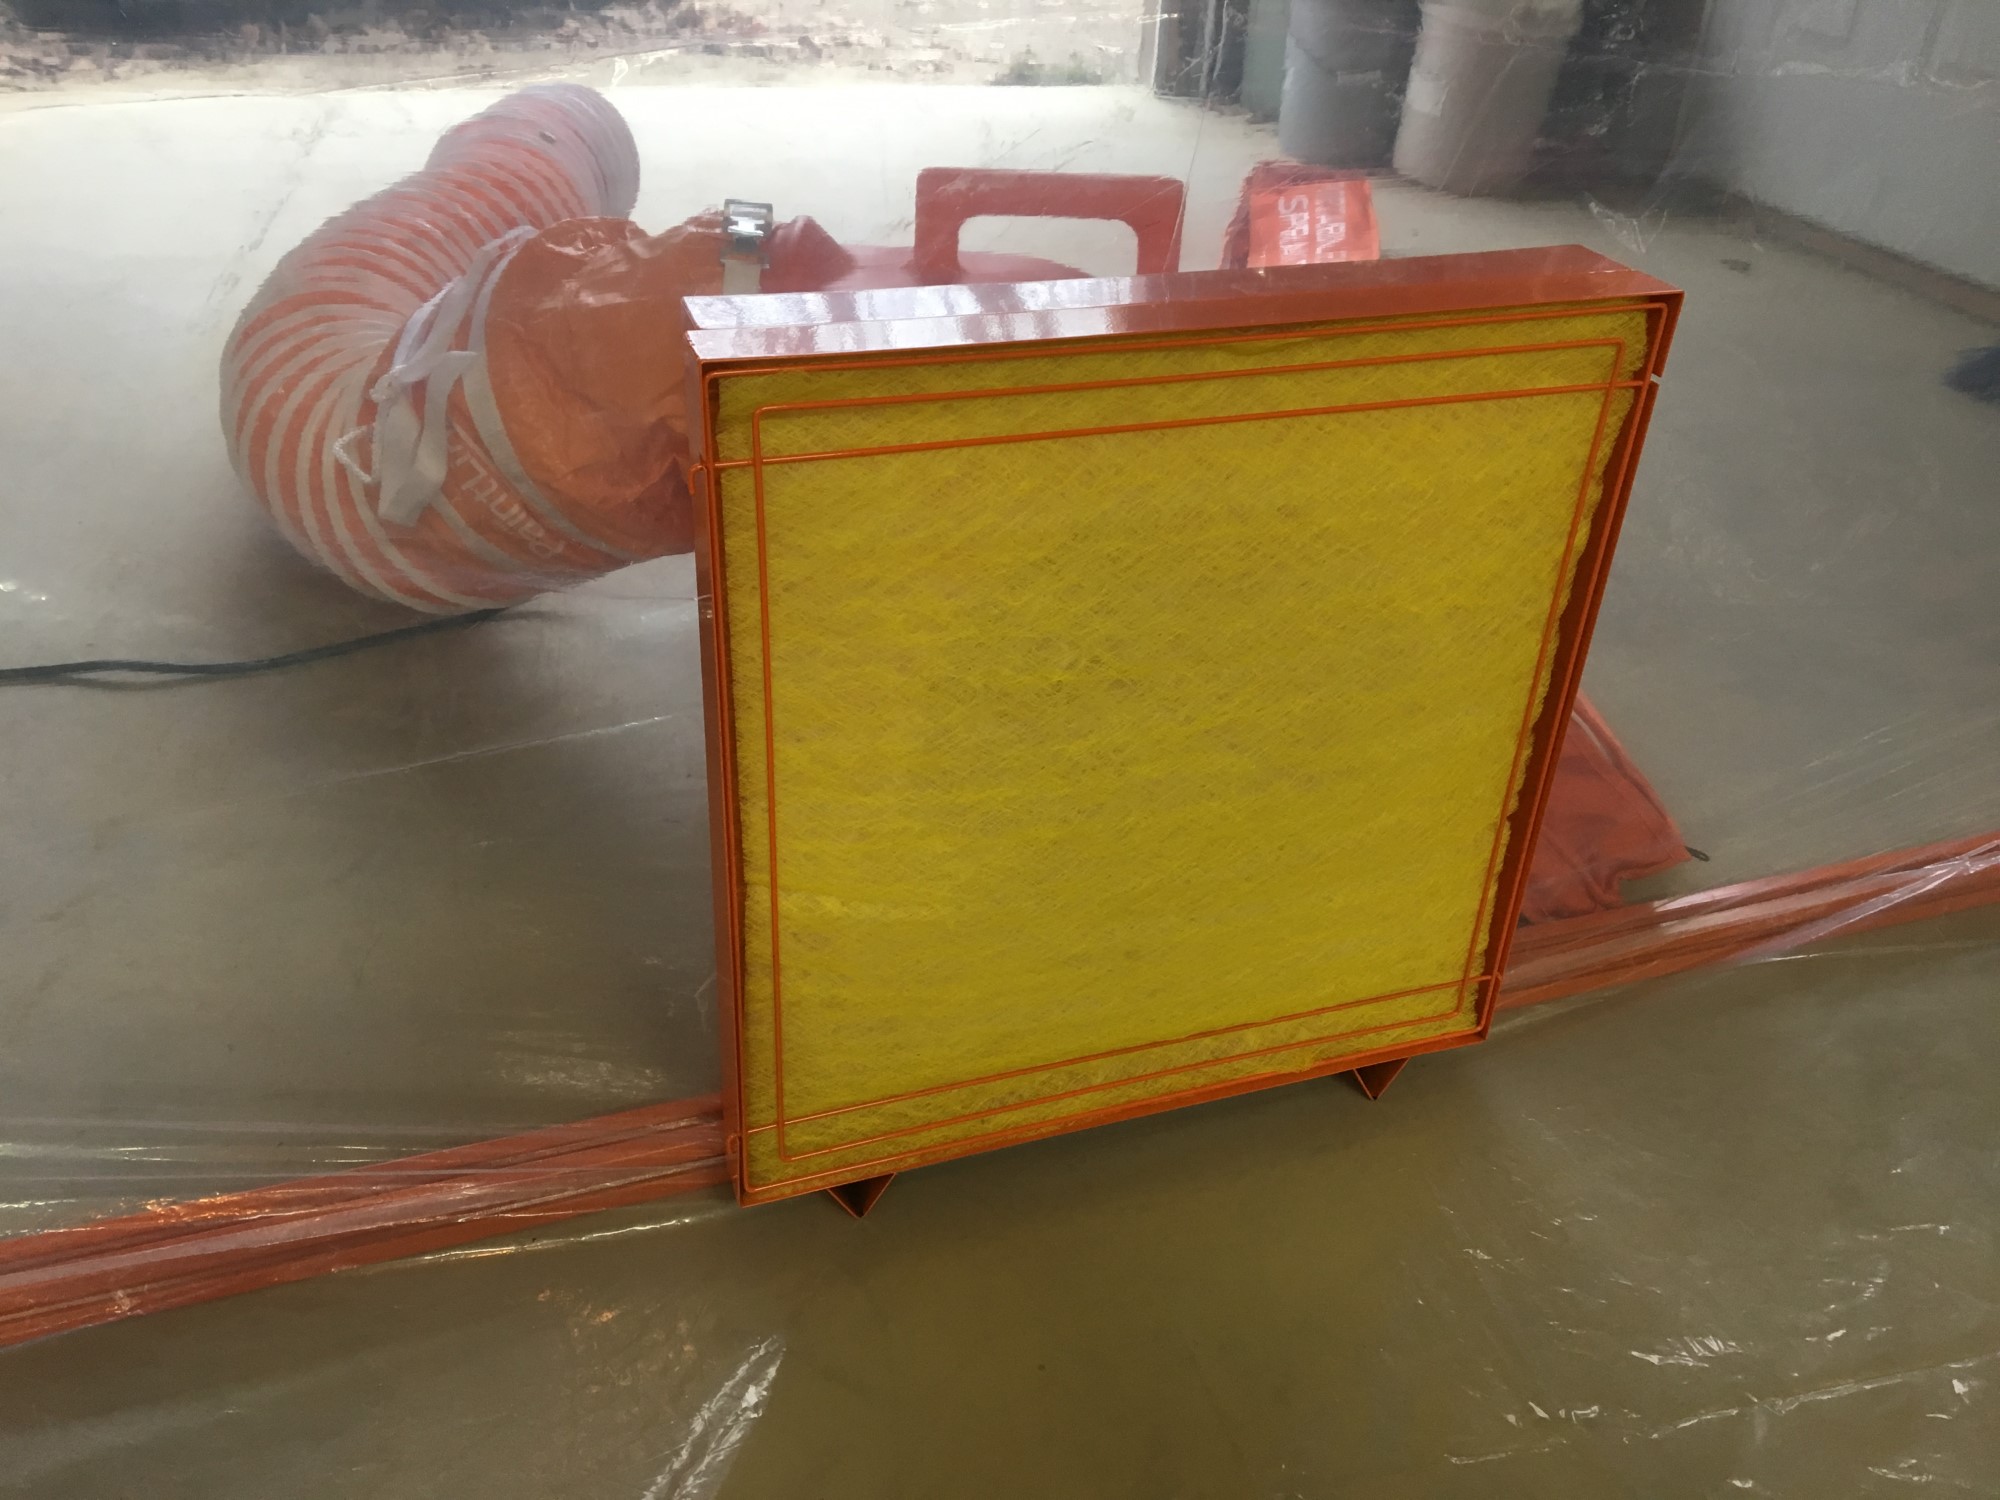
You can buy just the basic booth, but it is so much better with a filtered blower system.
To attach that, you first bolt in a vent flange to the frame extrusion and next attach a mating filter housing using a magnetic seal on the inside of the plastic. Then, you cut a hole in the plastic and clip in the filter material.
Finally, you attach the blower and ducting on the outside.
 All packed up, the entire kit, including liners, frame, vent, blower, and ducting, makes for a relatively compact and easily portable package.
The blower has carry handles, and the ducting collapses into itself with exterior handles for transport and storage. Similarly all the poles, posts, extrusions, corners, and three plastic liners fit in a neat canvas storage bag for transport.
Because the walls are plastic, there are warnings to not use the PJSB for solvent-based combustible finishes, but for water-based finishes, it seems like an amazing solution to jobsite finishing challenges. You can learn more at thepaintline.com.


Have something to say? Share your thoughts with us in the comments below.